
A practical six-step guide for pet brands, wholesalers, distributors, and online sellers developing private-label corrugated cardboard cat scratchers.
| 2–3 days Typical sample time for simple shapes using existing tooling | 5–7 days Typical sample time for new or complex structural designs | 15–30 days Common bulk-production range after final approval |
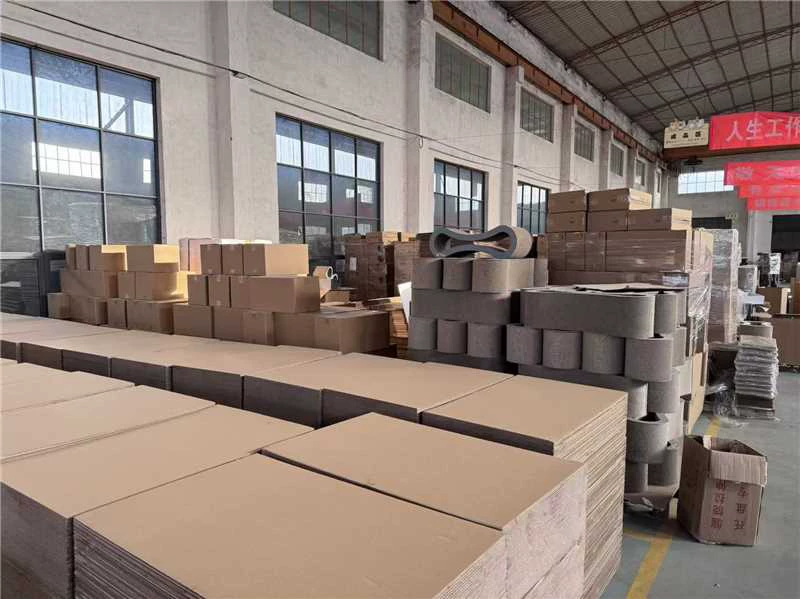
For a pet brand, marketplace seller, or wholesale buyer, Custom Cardboard Cat Scratcher Sampling is the point where an idea becomes a product you can actually evaluate. A rendering may look convincing, but it cannot tell you how dense the cardboard feels, how much debris the surface sheds, whether the edges are clean, or whether a cat will use the product.
A well-managed custom cat scratcher sampling process helps you confirm structure, materials, printing, packaging, and production feasibility before committing to a bulk order. This guide explains what to prepare, what happens at the factory, what to inspect when the sample arrives, and how to turn an approved prototype into a reliable production standard.
In This Guide
Why sampling matters before bulk production
The three factors that shape sample quality
What to send your supplier before sampling
The six-step custom sampling process
How to inspect and approve the finished sample
Common mistakes and frequently asked questions
Why Sampling Matters Before Bulk Production
Corrugated cardboard cat scratchers may look simple, but small differences in paper strength, flute profile, adhesive, compression, cutting accuracy, and pack-out can change the final user experience. Sampling gives the buyer and manufacturer a shared physical reference before mass production begins.
Confirm the scratching feel, surface density, and shedding level.
Check whether the shape is stable enough for scratching, resting, or climbing.
Verify product dimensions, fit, fold lines, tabs, and assembly points.
Review print placement, color, labels, and retail packaging.
Identify problems while changes are still relatively inexpensive.
The Three Factors That Shape Sample Quality
1. Paper and Corrugated Structure
The paper specification determines how the scratcher feels under a cat’s claws, how well it holds its shape, and how quickly the surface wears. A supplier may discuss paper basis weight, flute profile, the number of laminated layers, overall thickness, and compression strength. A common reference range for the paper core is approximately 120–180 gsm, but the correct construction depends on the product shape, target price, and expected use.
2. Dieline and Tooling Accuracy
The dieline controls dimensions, curves, slots, tabs, folds, and joining points. Simple round, square, or flat designs may use existing tooling, while custom houses, irregular curves, modular products, or interlocking structures usually require new tooling. Errors at this stage can affect stability and may create additional tooling costs later.
3. Cutting, Bonding, and Finishing
Clean cutting and consistent bonding have a major effect on the sample’s appearance. Poor trimming can leave rough edges or lifted paper layers, while uneven bonding can cause delamination or weak spots. The prototype should be checked for edge quality, layer alignment, structural stability, and odor before it leaves the factory.
What to Send Your Supplier Before Sampling
A clear brief reduces revisions and improves the chance of approving the first sample. Send as much of the following information as possible:
Product type and intended use: flat scratcher, lounge, bed, house, post, toy, or combination product.
Target dimensions, shape, and load-bearing expectations.
Target customer and retail positioning: value, mid-range, or premium.
Reference images or an existing product sample, if available.
Artwork files and logo requirements.
Preferred packaging format and sales channel.
Estimated order quantity and destination market.
Target sample deadline and expected bulk-production date.
The 6-Step Custom Cat Scratcher Sampling Process
Step 1: Define the Paper, Structure, and Finish
Start by confirming the product format and the performance you expect. The supplier should help translate your market positioning into a practical material specification.
| Specification | What to Confirm |
| Product format | Flat pad, lounge, bed, house, post, toy, or custom structure |
| Paper basis weight | Paper strength and density appropriate for the target design |
| Flute profile | B-flute or another profile selected for feel, density, and structure |
| Layers and thickness | Overall product thickness, stability, and load-bearing performance |
| Surface finish | Natural kraft, one-color printing, full-color printing, or branded outer wrap |
| Buyer tip: If you do not know which paper specification to choose, share your target retail price, sales channel, expected lifespan, and positioning. A capable supplier should explain the trade-offs rather than simply recommend the heaviest paper. |
Step 2: Confirm the Artwork and Dieline
Standard shapes may be produced with existing tooling, which usually shortens the sampling time. For a custom structure, provide editable vector artwork where possible—such as AI, EPS, CDR, or a press-ready vector PDF.
The engineering team will prepare a dieline showing the cutting path, folds, tabs, locking positions, and joining points. Before approving it, check the overall dimensions, curve proportions, opening sizes, print area, assembly method, and any parts that must fit together.
Important: Request changes before the cutting tool is made. Structural revisions after tooling may increase both cost and lead time.
Step 3: Review the Quotation and Sample Charge
For a simple prototype, a sample charge may be around RMB 300–500, although actual costs vary by size, structure, printing, tooling, labor, and packaging. Custom printed samples or complex structures may cost more.
Ask the quotation to separate:
Tooling or die-making charges
Prototype material and labor
Printing or proofing charges
Packaging development
Courier or freight charges
Whether the sample fee can be credited against a qualifying bulk order
Step 4: Tooling and Prototype Production
Once the dieline and payment are confirmed, the supplier moves into prototype production. The exact process depends on the design, but it may include:
Preparing or laser-cutting the die board
Laminating and pressing corrugated paper layers
Applying an appropriate low-odor adhesive
Die-cutting the final shape
Hand trimming and cleaning the edges
Checking the product for delamination and structural weakness
Before dispatch, ask the supplier to send clear photos or a short video showing the front, back, edge finish, dimensions, assembly, and packaging.
Step 5: Receive, Test, and Record Feedback
Do not approve a sample based on appearance alone. Test it as both a pet product and a retail product.
| Inspection Point | How to Check | Acceptable Result |
| Paper density | Scratch the surface by hand and observe debris. | Minor loose fibers may be normal; heavy shedding is not. |
| Edge finish | Run a hand along the cut edge and inspect each layer. | No sharp roughness, major fraying, lifting, or separation. |
| Odor | Open the package and check the adhesive or printing smell. | No strong irritating odor; any mild packaging odor dissipates quickly. |
| Cat acceptance | Let a cat scratch, sit, and move on the product. | The product feels firm and stable, and the cat is willing to engage. |
| Dimensions | Measure the main dimensions and fit of all parts. | Matches the approved drawing and assembles correctly. |
| Packaging fit | Pack and unpack the sample using the proposed retail pack. | The product is protected, presentable, and practical to ship. |
If the sample does not pass, give specific feedback. Instead of saying “the quality is not good,” identify the issue: excessive shedding, weak bonding, incorrect dimensions, unstable assembly, strong odor, poor print alignment, or unsuitable packaging.
Step 6: Approve the Golden Sample and Schedule Production
Once the prototype is approved, treat it as the “golden sample” for bulk production. The supplier should retain a matching reference sample, while you keep the buyer-approved sample.
The final approval file should record:
Approved physical sample and date
Final dimensions and tolerances
Paper specification and total thickness
Approved dieline and artwork version
Print color reference and logo placement
Packaging method, labels, barcodes, and carton marks
Inspection requirements and agreed acceptance criteria
After contract and deposit confirmation, bulk production commonly takes around 15–30 days, depending on order quantity, printing, packaging, tooling, and factory capacity. Complex projects or peak-season orders may require more time.
Typical Sampling Timeline
| Project Type | Reference Time | What May Affect the Schedule |
| Simple round, square, or flat design using existing tooling | 2–3 days | Material availability, size, and whether printing is required |
| New structural design or irregular shape | 5–7 days | Dieline revision, new tooling, assembly complexity, and testing |
| Printed prototype | Add 1–2 days | Artwork approval, proofing method, and color matching |
| Bulk production after approval | 15–30 days | Order quantity, packaging, print process, and production schedule |
Common Sampling Mistakes to Avoid
Choosing only by unit price: A cheaper construction may shed faster, deform in transit, or feel too soft in use.
Approving from photos alone: Photos cannot confirm odor, density, stability, edge quality, or cat acceptance.
Changing the structure after tooling: Late changes can require a new die and restart the sampling schedule.
Skipping packaging tests: A good product can still arrive damaged or look poor on the retail shelf.
Failing to document approval: Without an approved specification sheet and golden sample, production disputes are harder to resolve.
Frequently Asked Questions
- Do I need a sample before placing a bulk order?
It is strongly recommended, especially for a new structure, private-label packaging, or a new supplier. Paper density, shedding, adhesive odor, stability, and edge finish cannot be judged reliably from a rendering alone.
- Can I compare several paper options at the same time?
Yes. For a first project, comparing two or three constructions can make it easier to balance durability, feel, weight, and target price. Ask the supplier to label each sample clearly.
- Can printing be included in the sample?
Yes. Full-color artwork, sleeves, labels, or retail boxes can be included, but printing proofs may add cost and one or two working days. Confirm whether the print is a production-equivalent sample or a digital mock-up.
- Is the sample fee refundable?
Many suppliers credit part or all of the sample charge against a qualifying bulk order. This is a commercial policy, not a universal rule, so confirm the condition in writing before payment.
- What information is needed for an accurate quotation?
Send the product dimensions, shape, reference image or dieline, paper requirements, printing, packaging, estimated quantity, destination country, and target delivery date.
- What happens if the first sample is not approved?
List each issue with photos, measurements, and the requested correction. The supplier can then adjust the paper construction, adhesive, dieline, cutting, printing, or packaging and quote any additional sampling cost.
Final Thoughts
A cardboard cat scratcher is not defined by shape alone. Paper selection, tooling accuracy, bonding, finishing, packaging, and real-use testing all influence how the product performs and how customers perceive the brand.
A disciplined sampling process may add a few days at the beginning of a project, but it can prevent expensive rework, quality disputes, damaged packaging, and poor customer feedback during mass production.
| Planning a Custom Cardboard Cat Scratcher? Kitpups supports product structure, paper selection, prototype development, printing, and retail packaging. Standard designs may be sampled in 2–3 days, while new structural designs typically require 5–7 days. Request a Custom Sampling Plan |
Recommended author line: Written by the Kitpups Product Team
Kitpups • Custom Cardboard Cat Scratcher Sampling Guide